Getting Started: Dataplates

Dataplates capture the key information about a piece of equipment, such as model number, serial number, manufacturer, and other important details. Recording this information in the app helps your team quickly identify equipment, reference specifications, and keep service records organized. This article explains what dataplates are, why they matter, and how to capture them correctly during a job.
Feature Compatibility Requirements
Adding a New Piece of Equipment
Adding an Existing Piece of Equipment
Feature Compatibility Requirements
These features are toggled on by your Customer Success Manager.
XOi Version Requirements: 1.103 or higher
How It Works
Dataplate steps will have a set of buttons, allowing you to quickly add equipment.
Adding a New Piece of Equipment
To add a new piece of Equipment you can:
Take a Live Image
Select Capture button to open your camera.
You will see various icons on the screen:
Select to turn on the flash to help provide a better image of the dataplate.
Select to take a photo.
Select to upload a photo from your device's gallery.
Select to rotate the camera view.
There will also be feedback at the top of the screen stating if the dataplate is in focus.
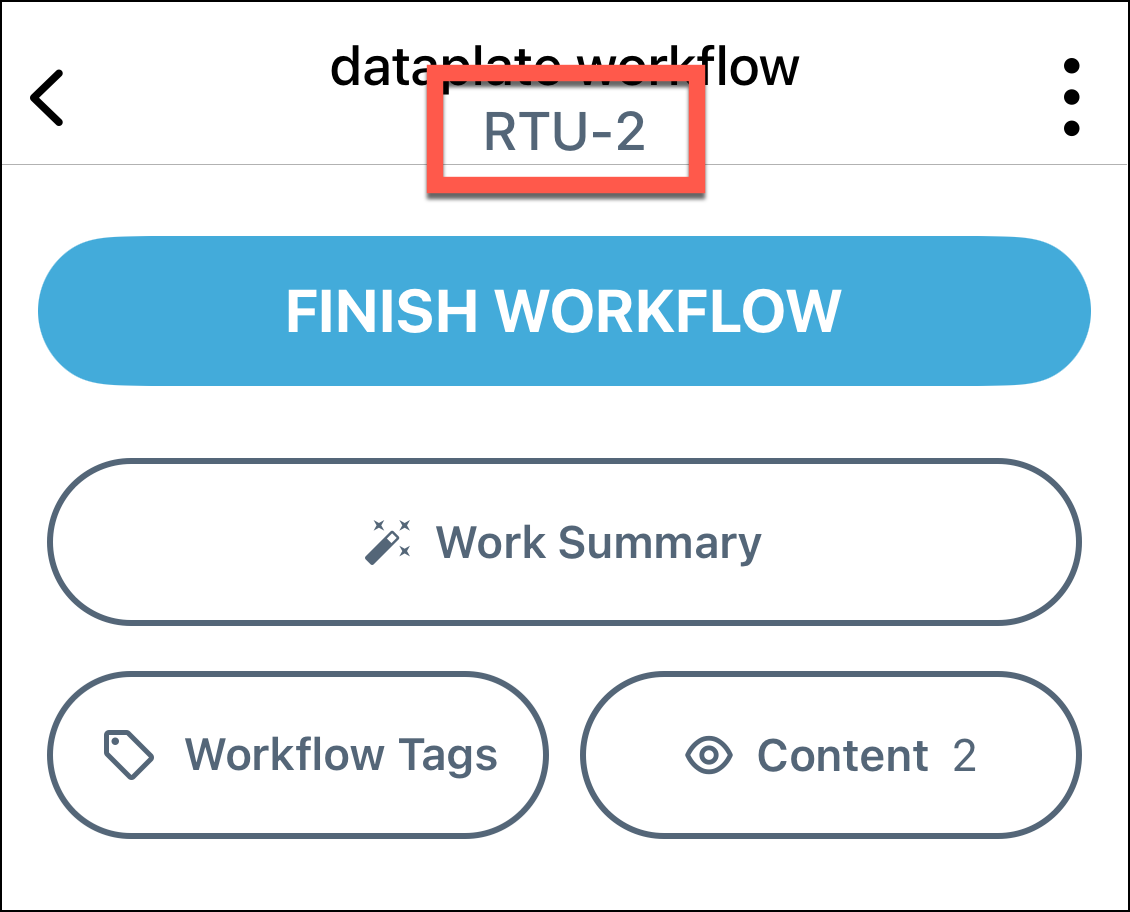
After providing the image you will be prompted to provide a name for the unit. The field, "Unit Name," is where you can enter an informal name that you and your team use to easily identify the equipment. Examples might include "RTU-1" or "Air Handler Rear Left."
Select Save name when done. You will be taken to a Confirm Equipment Screen.
Key details will be extracted such as the Make, Model, and Serial Number of the equipment for you. This saves time and ensures accuracy when documenting equipment.
Review the information to make sure it is accurate. If any of the fields need updating, tap the “Edit” button the right of the field.
If editing the Make, a dropdown list of available options will appear. Simply start typing to filter the list, then select the appropriate Make.
If editing the Model or Serial number the image of the dataplate will appear.
You can zoom in and out on the dataplate image to better identify any text. The red boxes highlight all the pieces of data that our image analysis engine has detected. Simply tap on any of the red boxes to select that text, and it will automatically fill in the corresponding field. The details can also be manually typed in.
Select Confirm.
Note: If the data is unreadable or not on the dataplate you may select Cannot Read.
This will present a pop-up to confirm you want to move forward with no data in that field.
Once you have confirmed all the data is accurate select Confirm Data.
Your equipment will be added to your workflow and a record will be created for future use.
While the best practice is to limit workflows to just one piece of equipment, you can always tap the Add or Manage Equipment button to add more pieces of equipment to the workflow step.
Upload From Gallery
Uploading from gallery allows you to use images you already have on your phone and add multiple at a time.
To do this, select Upload.
Choose the image(s) you would like to upload.
XOi will scan each image individually, looking for Make/Model/Serial. These are editable under the Edit Details button.
If XOi can't find Make/Model/Serial at all in the image, XOi will declare it is not a dataplate image but the image is still loadable and the details can be added to the image.
Once all images are uploaded you will be required to provide a Unit Name for each image.
Once provided the Save button will become clickable.
Each piece of equipment will be added to your workflow and a record will be created for future use.
Adding an Existing Piece of Equipment
When there is existing equipment already associated with the Customer and Location you will see a Preexisting Equipment button. Select this button to select from the list.
You can search for a specific piece of equipment utilizing the search bar at the top. It is best practice to search by Make, Model, or Serial Number.
To choose an existing piece of equipment, tap on the icon on the equipment card to add it into the workflow step.
This will add the equipment and its corresponding information to the workflow step.
Additional Dataplate Features
Workflow Labels
When the first dataplate is added to a workflow the Unit Name is automatically added as a workflow label on the corresponding workflow if it has not already been filled in. However, if a second dataplate is added to the workflow, the label will remain unchanged.
Note: If you remove the piece of equipment from the workflow and select a different piece of equipment, you will need to edit the workflow label. It will not change on its own.
To do this click on the three dot menu button, select Edit Workflow Label, and rename the workflow label.
Editing Dataplate Details
You can edit the Unit Name, Make, Serial Number, and/or Model Number by selecting See all details on the equipment record.
Press the Edit button to the right of Dataplate Info.
This area will also allow you to see Equipment Alerts, including Service History, associated with it and edit the details of the equipment (Make, Model, Serial Number, Unit Name) if you choose to do so.
Impact to Admin
Equipment records will be placed into Equipment Manager on XOi Web. These records are editable and any changes will reflect in XOi Mobile.
Design Changes
You can find recent design changes here: March 2026 Dataplate Capture
Comments
0 comments
Please sign in to leave a comment.